Overview: A High Sierra Route Guide for Sequoia National Park That Rewards Those Who Go a Little Farther

There are routes in the Sierra that check all the boxes—alpine lakes, high passes, wildflowers, and solitude—and then there are routes that quietly exceed expectations.
The Silliman Pass route out of Lodgepole is one of those.
At first glance, it looks like a straightforward out-and-back to Twin Lakes. But for those willing to push over the pass and continue deeper into the backcountry, the experience shifts. Ranger Lake brings beauty and energy. Lost Lake brings something quieter—something that feels more like what the Sierra used to be.
This was the experience we were looking for on our first visit Backpacking in Sequoia National Park in 2024.
This is a trip that builds as you go. And if you do it right, it finishes with one of the more memorable backcountry camps you’ll find in Sequoia National Park. A trip that give you plenty of options to explore alternative routes, change camp location based on energy and delivers the High Sierra Route Views that so many chance.
Trailhead & Permits
Trailhead: Lodgepole Campground
- Large parking area just before the creek crossing
- Easy access and well-marked start
- Ranger station check required for park entry
Permits
- Reservations through Recreation.gov (recommended up to 6 months in advance)
- Walk-up permits available daily based on quota
- Pick up permits at Lodgepole Visitor Center
Bear Canisters
- Required for all overnight travel
Sierra Rec Tip
There is an alternate start near Wuksachi Lodge that skips the first 450 feet of climbing, but parking there can be limited and might be highly discouraged) . Lodgepole offers a more reliable and straightforward start to the trip. We also know of start points that begin in the Jennie Lakes Wilderness regions to the North.
Route Stats (Approximate)
- Trailhead to Twin Lakes: ~6.5 miles | ~2,000–2,500 ft gain
- Twin Lakes to Silliman Pass: ~1 mile | ~1,000 ft gain
- Pass to Ranger Lake: ~1–1.5 miles descent
- Ranger Lake to Lost Lake: ~1.5 miles
- Total Distance (Out & Back): ~16–18 miles
Highest Elevation: ~10,173 ft (Silliman Pass)
Day 1: Lodgepole to Twin Lakes
A Gradual Start That Builds Into a True Sierra Climb
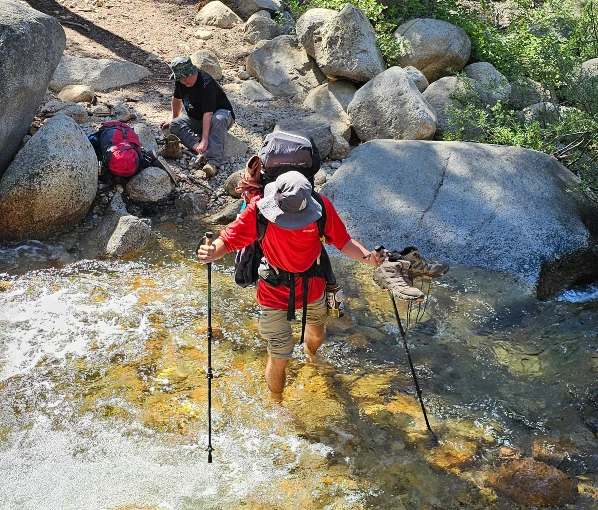
The trail begins with a steady climb out of Lodgepole, gaining about 450 feet through shaded forest before connecting near the Wuksachi junction.
Just beyond this section, you’ll reach your first creek crossing, an important early water source. From there, it’s only about half a mile (or slightly more) to Cahoon Meadow, not the full 3 miles often assumed.
From the trailhead:
- ~3 miles total to Cahoon Meadow (~970 ft gain)
- Gradual climbing through forest and open terrain
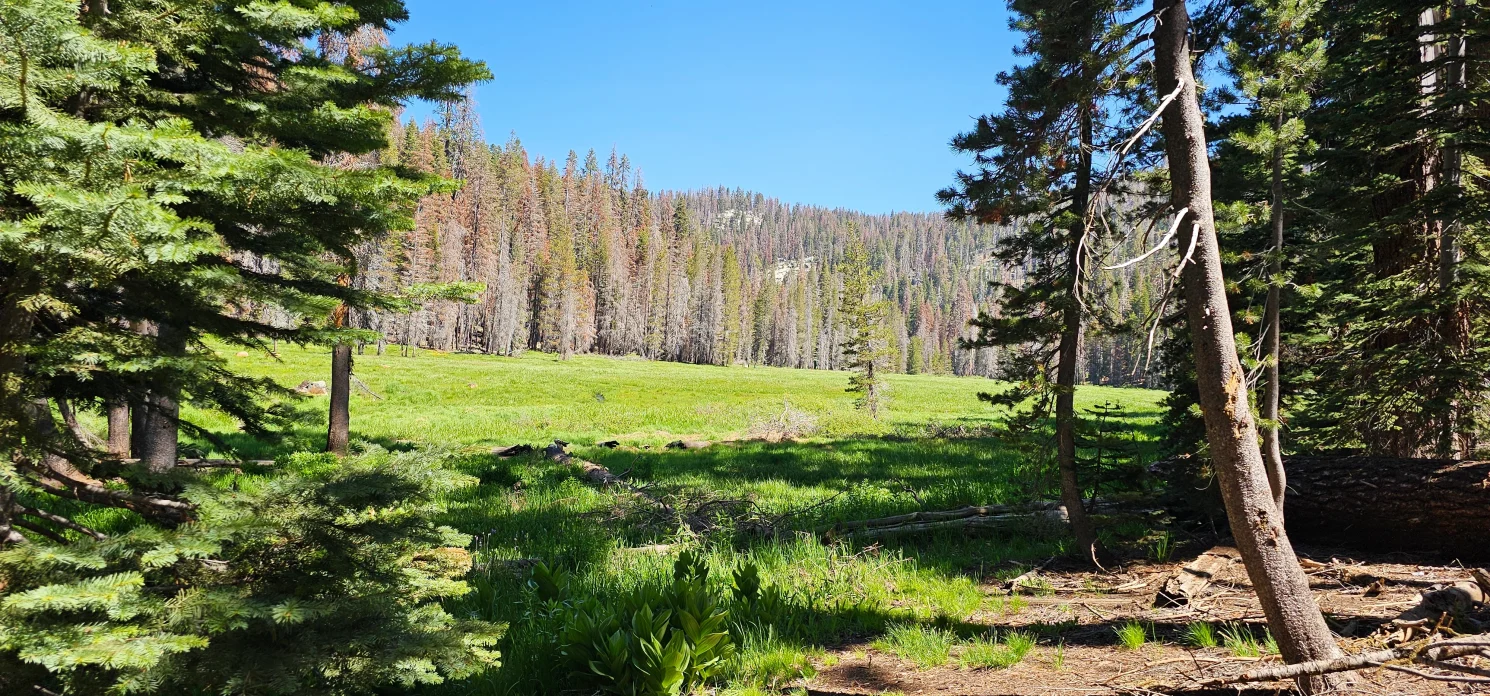
- In late June, the meadow can be filled with vibrant wildflowers
Cahoon Meadow feels like a natural break in the climb. It’s one of those quiet Sierra pockets where the pace slows and the surroundings start to open up.
Cahoon Gap: Where the Effort Sets In
Leaving the meadow, the trail climbs another ~1,000 feet to Cahoon Gap. This section is steady and exposed, and on warm days, the temperature can make it feel more demanding than the elevation alone suggests.
From the gap, the trail drops into the Clover Creek drainage, offering a brief reset before the final climb.
Final Push to Twin Lakes
After the turn toward Twin Lakes, the trail changes character:
- Rockier footing
- More sustained climbing
- Increased sun exposure
This final section climbs another ~1,000 feet, and it’s where the day starts to feel earned.
Then the granite opens up, and Twin Lakes sits tucked into a high alpine basin beneath Silliman Pass.

Twin Lakes Camp Strategy
Twin Lakes is a natural stopping point and a smart first-night camp for most groups.
What to Expect
- Moderate number of campsites (15–20 on busy weekends)
- Mosquitos present, especially near shoreline
- Shallow water near camp areas
Best Campsites
We found excellent camping along the creek exiting the southern lake, offering space and a bit of separation from heavier traffic.
Sierra Rec Insight
Twin Lakes is a beautiful place to spend a night, especially with the granite walls rising toward Silliman Pass. But it’s not the highlight of this trip—it’s the gateway.
Sunset here, looking back toward the pass, is a moment worth slowing down for.

Day 2: Twin Lakes to Silliman Pass
A Short Climb That Demands Respect
The climb to Silliman Pass is only about a mile, but it’s a consistent ~1,000-foot gain via switchbacks.
At elevation, the effort is noticeable. Even strong hikers will feel the thinner air and steady grade.
Silliman Pass: The View That Defines the Route
At the top, take your time.
The views from Silliman Pass stretch across the Southern Sierra in a way that feels expansive and raw. Peaks layer into the distance, and the scale of the terrain becomes clear in every direction.
We dropped packs and explored:
- North along the ridge toward Lost Lake and Ranger Lake
- South toward Silliman Peak
This is the visual payoff—and one of the defining moments of the trip.

Descent to Ranger Lake: Route Awareness Required
The descent from Silliman Pass is where conditions change.
At the time of our trip:
- Trail sections were washed out or obscured
- Downed trees and slides disrupted the route
- The trail was easy to lose in places
That said, navigation is manageable:
- The lakes are clearly visible below
- Direction of travel is intuitive
We used Gaia GPS briefly to confirm direction, but overall route-finding is straightforward with awareness.
Once lower on the slope, the trail becomes easier to follow again.
Ranger Lake
The Social Hub of the Route
Ranger Lake is where most backpackers stop.
- Numerous established campsites, especially on the north side
- Bear boxes available
- Clear, refreshing water ideal for swimming
- Strong views of Silliman Peak and surrounding granite
Ranger Lake has energy. It’s social, accessible, and undeniably beautiful.

Lost Lake: The Reason to Go Farther
A Different Kind of Sierra Experience
From Ranger Lake, Lost Lake sits about 1.5 miles farther, crossing a small canyon before climbing into a more enclosed basin.
Lost Lake is largely ringed by forest, with a noticeable shift to red fir and mixed forest. Fallen timber and forest debris from older stands give the area a more rugged, less manicured feel.
What to Expect
- Only a few established campsites (~3)
- Bear boxes available
- Fire rings present (fires allowed on this side of the range)
Water & Setting
- Water is not as clear as Ranger Lake
- But every bit as refreshing after a long day
Key Feature
The granite ridge behind the lake is where sunset comes to life, lighting up the basin in deep, warm tones.
Sierra Rec Tip: Go Higher
Above Lost Lake, on the north side, sits a second unnamed lake.
- Fairly easy climb to reach
- Even fewer visitors
- A great option if you’re looking for complete solitude or a quiet side exploration
The Lost Lake Experience
Lost Lake is where this trip becomes something more.
Evening here settles in differently:
- A quiet swim
- A small fire as the sun drops behind the ridge
- Granite catching light as if it’s glowing
It’s quieter than Ranger Lake. More still. More reflective.
And on the right night, it feels like you’ve stepped outside the flow of the rest of the Sierra.
Water Availability
Water is reliable throughout this route, especially in June. Bring your water filters but you should not need to carry extra water in the various segments, saving weight in your pack.
Key sources:
- Creek crossings early in the hike
- Cahoon Meadow
- Clover Creek
- All lakes
You can plan lighter water carries compared to drier Sierra routes.
Conditions & Challenges
Heat
- Exposed sections between Cahoon Gap and Twin Lakes can be hot
Mosquitos
- Present throughout at meadows and lakes
- Can increase quickly depending on hatch timing
Trail Conditions
- Well-defined to Twin Lakes
- Less reliable descending from Silliman Pass
- Easy to follow route from Ranger Lake to Lost Lake
Altitude
- Noticeable at and above 10,000 feet Silliman pass.
Difficulty Rating
Moderate to Strenuous
- Strong beginner backpackers: Twin Lakes overnight
- Intermediate hikers: full route to Lost Lake
- Not ideal as a first backpacking trip just because of the climb section are a bit rough, but over all trip into Twin Lakes is suitable for beginners with good fitness.
Alternative Loop Option
For those looking to extend the trip, some backpackers turn this into a loop:
- Continue beyond Ranger Lake toward Seville Lake
- Then connect over toward JO Pass
- Return via an alternate route without re-crossing Silliman Pass
Important Consideration
- This loop includes a long dry section with limited water access
- Plan water refills carefully and carry extra capacity when needed
This variation adds distance and complexity but offers a broader look at this section of Sequoia’s backcountry.
Suggested Itineraries
3 Days / 2 Nights
- Night 1: Twin Lakes
- Night 2: Ranger or Lost Lake
- Exit Day 3
4 Days / 3 Nights (Recommended)
- Night 1: Twin Lakes
- Night 2: Lost Lake
- Night 3: Twin Lakes (return)
Trail-Tested Takeaways
- Twin Lakes is a strong first camp
- Ranger Lake is the most popular for good reason
- Lost Lake is where the experience becomes memorable
Gear we used and Loved on this trip:
- Water Filtration: Platypus QuickDraw™ Filter –Fast Flowing: Hollow fibers filter up to 3 liters per minute with normal squeeze pressure or 1.75 liters per minute in a gravity setup.1
- Haeleum Active Gear for Mosquito Protection
- WindBurner® Personal Stove System– System perfectly nests components inside the 1.0 L pot, with extra full-sized bowl snapping onto the outside.
Final Sierra Rec Take
This route builds slowly, asks a little more of you than expected, and rewards you if you keep going.
Ranger Lake may be the destination for most. But Lost Lake is the reason to do the trip.
It’s quieter. More grounded. And on the right night, it feels like the Sierra is yours alone.
Silliman Pass Backpacking FAQs
Do you need a permit for Silliman Pass?
Yes. A wilderness permit is required for all overnight backpacking trips in Sequoia National Park, including the Silliman Pass route. Most hikers reserve permits in advance through Recreation.gov, often up to six months ahead. A limited number of walk-up permits are also available daily based on trail quotas. Permits can be picked up at the Lodgepole Visitor Center before starting your trip.
Can beginners hike to Twin Lakes in Sequoia National Park?
Twin Lakes is a good option for strong beginners, but it shouldn’t be considered an easy first backpacking trip. The hike gains roughly 2,000+ feet over 6+ miles, with sections of heat and sustained climbing. If you have some hiking experience and can manage elevation gain with a pack, Twin Lakes makes for a rewarding first overnight destination. Beyond Twin Lakes, the route becomes more demanding.
Is Lost Lake worth the extra distance past Ranger Lake?
Yes—and for many hikers, it becomes the highlight of the trip. While Ranger Lake offers more campsites, clearer water, and easier access, Lost Lake delivers a quieter and more remote experience. With fewer camps, more solitude, and a dramatic granite backdrop that lights up at sunset, Lost Lake feels like a step deeper into the Sierra. If you have the time and energy, it’s well worth the extra mile and a half.
How difficult is the Silliman Pass hike?
The Silliman Pass route is considered moderate to strenuous. The climb from Twin Lakes to the pass gains about 1,000 feet in a short distance, and the elevation (over 10,000 feet) makes the effort more noticeable. The descent toward Ranger Lake can also present route-finding challenges depending on trail conditions. Hikers should be prepared for elevation, heat, and changing terrain, especially if continuing beyond Twin Lakes.
When is the best time to backpack Silliman Pass?
The best time to hike Silliman Pass is typically from late June through early October, depending on snowpack. Late June and early July often bring wildflowers and strong water flow, while August and September offer more stable weather and fewer mosquitoes. Early season hikers should be prepared for snow near the pass in heavier snow years.
Are there bears along the Silliman Pass route?
Yes. Black bears are active throughout Sequoia National Park, including the Silliman Pass area. Bear canisters are required for all overnight trips, and proper food storage is essential. Bear boxes are available at some camps near Ranger Lake and Lost Lake, but you should still carry your own approved storage.
